Thursday, November 26, 2009

Thanksgiving 2009


Though many competing claims exist, the most familiar story of the first Thanksgiving took place in Plymouth Colony, in present-day Massachusetts, in 1621. More than 200 years later, President Abraham Lincoln declared the final Thursday in November as a national day of thanksgiving. Congress finally made Thanksgiving Day an official national holiday in 1941.

According to the U.S. Census Bureau, Minnesota is the top turkey-producing state in America, with a planned production total of 49 million in 2008. Just six states—Minnesota, North Carolina, Arkansas, Virginia, Missouri and Indiana—will probably produce two-thirds of the estimated 271 million birds that will be raised in the U.S. this year.

In a survey conducted by the National Turkey Federation, nearly 88 percent of Americans said they eat turkey at Thanksgiving. The average weight of turkeys purchased for Thanksgiving is 15 pounds, which means some 690 million pounds of turkey were consumed in the U.S. during Thanksgiving in 2007.


Just think - if the natives had given the Pilgrim fathers a donkey instead of a turkey, we all would be having a piece of ass for Thanksgiving.


The first time the Detroit Lions played football on Thanksgiving Day was in 1934, when they hosted the Chicago Bears at the University of Detroit stadium, in front of 26,000 fans. The NBC radio network broadcast the game on 94 stations across the country--the first national Thanksgiving football broadcast. Since that time, the Lions have played a game every Thanksgiving (except between 1939 and 1944); in 1956, fans watched the game on television for the first time.

Wednesday, November 25, 2009

Update on Gaskets

Gaskets did not come in...Surprise, surprise...

Tuesday, November 24, 2009

Top-end Rebuild, Part 11

Well, I ran into my first snag on this job.

I originally ordered gaskets, waited 14 days for their delivery, picking them up on Saturday. I got home, opened up the gasket package, damn, no base gaskets.

I returned to the dealership the next day, Sunday, talked to the parts manager that I had to rustle up from the back of his office, he originally told me that they would be closed tomorrow, Monday, and that he would re-order the parts on Tuesday, again having to wait the 14 days to be shipped and received.

I objected, he reconsidered his options, said he would order the parts from his home on his day off (Monday) and have them delivered on Tuesday by 3:00P.M.

I'm not going to hold my breath, but will keep my fingers crossed!

Monday, November 23, 2009

Top-end Rebuild, Part 10

I got up this morning and had a great breakfast that my wife made, after which I made my way down to the Harley shop to pick up some of the parts that were on back order.
Taking into account that the bike is 13 model years old, (some people would say it's a classic) I ordered some silicone spark plug wires to replace the original ones.
These are the new pistons that I ordered.
Note the designation to the orientation that is stamped on the top of the pistons.
F= front cylinder, R= rear cylinder, arrows need to be installed pointing to the front of the engine.
I will get these down to the machinist on Monday so they can be fitted to the cylinders.

Saturday, November 21, 2009

Top-end Rebuild, Part 9

While waiting on parts, I'm checking some of the other items on the motorcycle, here's the carburetor.I disassembled the carburetor checking the internal parts for any wear. Also, I checked the jet sizing and needle shims to insure that the proper sizes were installed for the increase in compression.

I used compressed air to blow out all the passages. After it all was reassembled I cleaned up the outside. It's all ready for the install. Where are the part's?

Friday, November 20, 2009

Top-end Rebuild, Part 8


While I'm waiting on parts I am doing some deep cleaning and other adjustments
that I have been wanting to do, specifically adjusting the handlebar. I didn't like
the position that I had them in, also, I couldn't get the clamps to tighten
enough to hold them in place.
So, here is my attempt to secure the handlebar. I drilled and tapped the top
saddle clamp for a set screw. I positioned the handlebar where I wanted, tightened
the clamps down almost tight, then ran the set screw down as far as possible,
then gave the clamps a final tightening. I think it's going to work great.

Thursday, November 19, 2009

Top-end Rebuild, Part 7

Another specialty tool that is needed is a device that holds the lifter/roller inside the lifter block while assembly.
There are several ways that are suggested in the factory manual to accomplish this, one being a magnetic tool, well here is my attempt...
I went to the hobby shop and bought some ferrite ceramic magnets, each having
a pulling/lifting capability of 7 lbs. I used hot glue to assist in holding the
magnet to the orange u-shape holder. I tried it and it worked beautifully.

Wednesday, November 18, 2009

IHACI

Today, three fellow employee's and myself attended a trade show that was held in Pasadena, California.
The Institute of Heating and Air Conditioning Industries, Inc., is a non-profit trade association of contractors, manufacturers, distributors, utility firms, and related businesses actively engaged in the heating, ventilation, air conditioning, refrigeration, and sheet metal industries.
Formally incorporated in 1948, IHACI remains a progressive association dedicated to the education, promotion, and growth of our industry.
Sign in booths, register, receive name tag and goody bag.
Through membership involvement and participation, and adherence to the IHACI Code of Ethics, the association is able to render a myriad of services and benefits to its participating members.

Saturday, November 14, 2009

Top-end Rebuild, Part 6

Some of the procedures I'm doing requires specialty tools specific to the job. The above picture depicts a lifter block tool that is used to align the blocks when installing said blocks. This insures that the oil galley/holes line up correctly to ensure proper lubrication to the lifters. I didn't want to purchase these tools for just one time use, so...I fabricated them.

I took some 1/4-20 bolts 2" long and wrapped the thread to protect them.
I then took some two part epoxy putty, kneaded it together and applied to the bolts in a pyramid shape.
After epoxy hardened I chucked the bolt up in the drill press and using a file I "lathed" the part into shape.

These are close to the finished product. Just a little more fine filing and I was there.This tool pictured and the lifter block alignment tool pictured above I made after getting the idea from Todd8080 at Todd's Harley Pix. The clearances are so tight between the rocker boxes and frame that you need this allen wrench tool for 4 of the fasteners.

Top-end Rebuild, Part 5

Well, it was suggested that I check the rollers on the lifters,
as much as I didn't want to find a problem I did! The hardening on the surface of one roller and and the corresponding cam lobe was subject. So, down to the dealer I went, $245.34 later I have a new Andrew's 27 cam shaft, HD lifters and associated gaskets, seals, bushing and bearing to replace the faulty parts.
Here are the new lifters soaking in oil, getting them ready for the install. Please don't tell Debbie I'm using her good Tupperware. :)
A look inside the cam cavity.
I will replace the seal and brass bushing in the nose cone.

Friday, November 13, 2009

Top-end Rebuild, Part 4

Here is the pile of old gaskets and seals.

Some of the parts cleaned and ready for install. I have the heads and cylinders down at the machinist. He made measurements of the cylinders, no problems. I ordered pistons, gaskets and misc other parts. Seven to ten days back order on all the parts, I guess that's what you get when you own a classic, so says the dealer! That just fries my ass. The bike is only 13 model years old and the dealer doesn't stock the basic parts! WTF!

Thursday, November 12, 2009

Wednesday, November 11, 2009

Top-end Rebuild, Part 3

This is the rear rocker box that was leaking at the corner. You can see
where the gasket was compromised.

Both heads, nothing appeared to have failed.
Getting down to the cases.
Little closer, more detail.
The other side of the bike. A little carbon built up on both pistons.
Cylinders looked good, can still see honing marks.
Will get the heads and cylinders down to the machinist in the A.M.
Curious to see what the measurements are of the cylinders and pistons. Rings
are in good condition, none broken or seized.
Clean, thanks to regular oil changes.
Down to the cases. Now it is time for the tedious job of cleaning and prepping
for the assembly. I have about 3 hours into the job now. The assembly
will take three times that I'm sure. More pictures to come...

Top-end Rebuild, Part 2

I got the tunes rocking and started in on the wrenchin'
I started by getting the "Bible" out to have handy if needed.
You start at the top and work your way down.
Fuel tank on the bench, away from the gas water heater, don't want to go ka-boom!
Have the console laid back out of the way.
It really gets dusty and dirty up under the tank.
I'm going to go through the carb while it's off. I had a intake leak that I found.
The intake manifold to the head gasket was cooked.
This is the rear intake port. This is the gasket surface that had the cooked gasket.
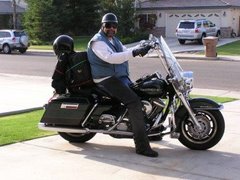
I am the original owner of this bike. I have never had the intake manifold off
prior to this job. Notice the manifold is bent. It must have been dropped on the assembly line.
Anyone have an extra one laying around?
I've been anal about service on this bike, changing the fluids what some
say is excessive, every 2500 miles. Look how clean the interior surfaces are!image
Keep in mind this motor has 60,000 miles.


I'll get the other head and the cylinders off tomorrow and to the machinist.
I'm leaning to the Screamin' Eagle cast pistons with 10.0 to 1 compression.
The cam that I'm running will bring the compression down around 9.47 to 1.
Going to go with the stock heads, stock thickness head gaskets, just freshen them up.
Any suggestions, I only want to do this once.